Have you ever received your used R/C in the mail and been devastated that it wasn’t packaged correctly and was damaged? This scenario is even more tragic when dealing with vintage R/Cs because its hard to source new vintage parts. This blog article will walk through some do’s and don’ts of packing R/C cars to make sure that you maximize your odds of getting your car to its destination in one piece. I buy a lot of R/C cars and parts! I have seen my fair share of good and bad packaging over the years. Hopefully this article will prevent you from making the same mistakes I see over and over again.

Let me start by saying that regardless of whether you ship with USPS, UPS, or FedEx, your package is going to get abused on its journey to its destination. When I was in college, I worked for UPS on school breaks as a driver’s helper. I got to work with a number of drivers and one thing I got out of that experience was that your package is going to get abused! It will get thrown. It will get stacked. It will even get used as a lunchtime seat or a foot rest. So, if you want your R/C to arrive in one piece, you are going to have to package it right.
Vintage R/Cs are precious cargo, if for no other reason it’s really hard and really expensive to find replacement parts. You can’t just go down to your local hobby store to find a new one, so please ship with care. Of course even if you are shipping a Re-Re, following a few simple steps can make the receiver happy and not sad.
Body Shell
The biggest packing fail I would like to stress here has to do with shipping your car or truck with the body attached. I would have to say that almost every time I have received a car with the body attached there has been some kind of damage. It doesn’t matter if its a hard body or a polycarbonate, they can easily crack. Remember, these things are old!

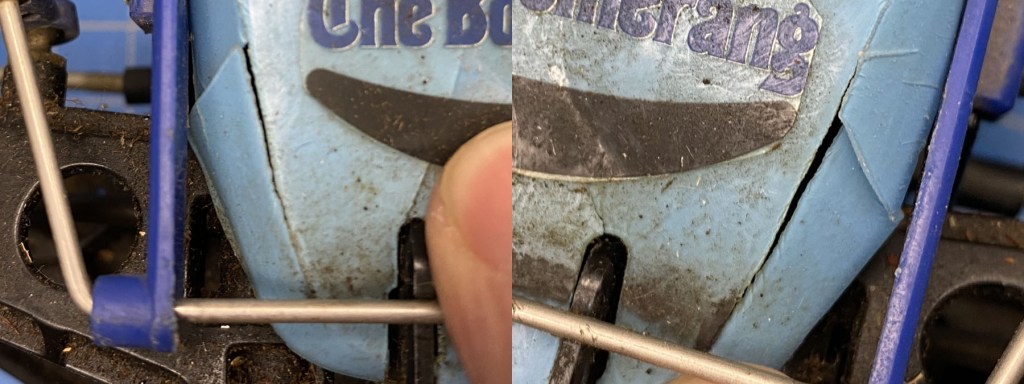
The problem occurs when the weight of the car puts stress on the shell. Since the shell is attached, it can only flex so far before breaking. Body post areas are especially susceptible, although they are not the only places that will break. Wings are also fragile, as well as any place the shell might be tightly locked into the chassis. This Boomerang was packaged just with packing peanuts, which might seem like a good idea, but there is a lot of space for things to move and flex during shipping which allows the weight of the car to shift and put stresses on different parts of the shell. I would not recommend that approach.
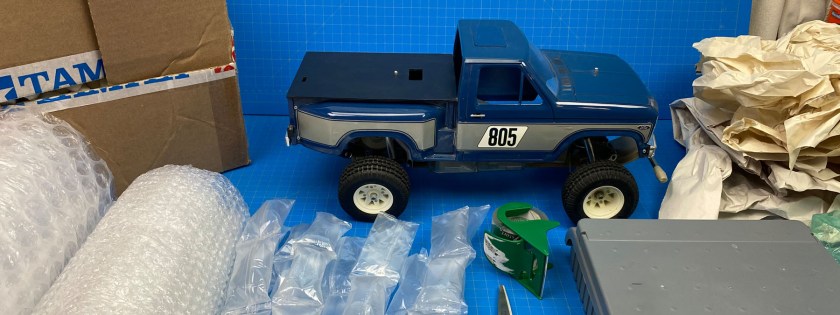
So that’s the bad news on body shells. What I would recommend you do is physically remove the body from the chassis and package each part separately. Pay special attention to wrapping the shell with bubble wrap. Also make sure that you fill the body cavity with packaging material so that there is as little compression opportunity as possible. If you are also shipping the chassis, make sure that the box is small enough where you do not have to fill large open spaces with packing material. Make sure the chassis is wrapped appropriately so its sharp edges and weight don’t become the problem.
If you want to earn a gold star from the teacher, create a structure around the body after its protected and then pack that inside the rest of the box.
The Box
I have to say that no matter what you are shipping, the number one item which seems to be overlooked is your box. I have seen some really good boxes, and some really bad boxes in my time. So what should you avoid? There are two things that I would make sure you never do with boxes. The first is to use a weak box.
When I first received this box I got pretty mad at the post office for destroying it. At least they took the effort to put a plastic bag over it in order to collect all the broken pieces that were falling out. After I took the bag off there wasn’t a single part of the box that wasn’t bent or cracked open. It wasn’t until I emptied the box that I realized the contents had been doomed from the beginning. The shipper had used a flimsy chip bag box. It never had a chance.
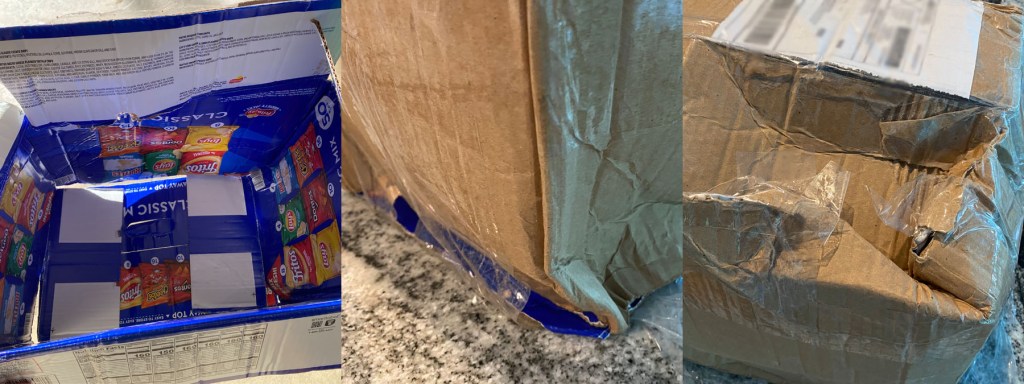
The second thing to be mindful of when it comes to your box is to make sure that there is never too much open space after you pack everything up. No matter how hard you try to fill open spaces with packing material, things will shift and crush. Your best bet here, which I have seen done successfully over and over, is to make your own box. It’s not as hard as you think! You can cut down from the top at the corners and then fold in any extra space. Once it fits snug you can just simply tape your new seems. However if you cut it down and leave void spaces it is guaranteed to crush. But if you cut down correctly so it fits nice and snug, it makes a great carrier for shipping with high odds of success.
If you don’t make your own box at least try to create fillers that have some structure. This approach works really well when the things you are shipping have naturally large gaps or obscure shapes that make it hard to get the box to fit correctly.

This next topic gets really scientific so you might want to pay attention! … You need to make sure you always secure your pointy thingies! … Seriously though, the body shells are your biggest problem but that doesn’t mean you have nothing else to worry about. Here are a few tips that will avoid some other very common types of damage I see from improper shipping practices.
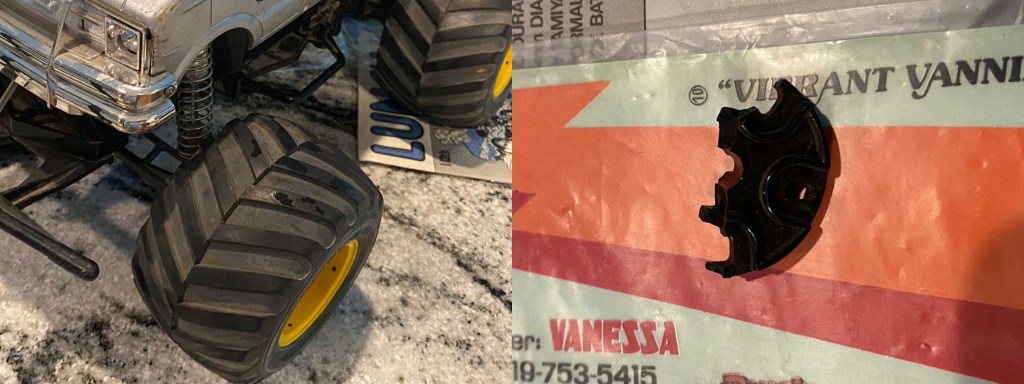
First up are the tires, which sometimes require special handling, especially for the larger truck tires like the Lunchbox. They take up a lot of surface area and can get some unusual forces applied. I would recommend always removing the larger tires while shipping. If you are shipping a buggy with the smaller tires, you are usually ok leaving them attached as long as you are following the other advise in this article. However I still like to remove them when I ship.
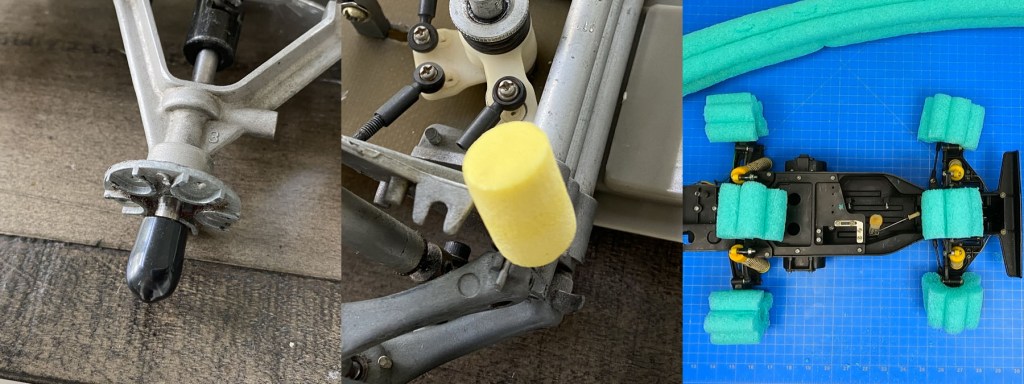
Removing the tires will save some components but also expose others. Your first pointy thing to secure are the axle ends. These will become lethal weapons that will punch through any box you throw at it. I have received way more than a few kit boxes with nice punch holes through them because the chassis was inside the box and the axles were not secured.
Some innovative ideas I have seen to help with this problem is to use plastic caps that sometimes come with other shipped merchandise you buy. Something else that works well is to cut up a pool noodle and place it around the axle.
The other pointy thingy you need to watch out for are the body posts. These can also reveal themselves as lethal weapons if not secured appropriately. If you are putting the chassis inside your kit box make sure it has no chance of poking through the box. Another cool idea for body posts are the use of ear plugs stuck onto the point of the post. Pool noodles also work well here.
NIB Packing (New In Box)
This topic is dear to my heart because in addition to collecting and restoring used vintage R/Cs, I also have a large collection of vintage NIB kits. If you are selling a NIB kit please, please, please make sure that you adjust your sale price to account for some very extensive packaging. I mean someone is spending top dollar on a NIB kit and the value of vintage kits is all about how pristine the inside and outside of everything reaches you. There is nothing more disheartening than paying top dollar for a NIB kit only to find out that a lazy shipper introduced a new scratch or gouge on the box, or even worse, having one of the tree parts break off from the parts tree due to movement.
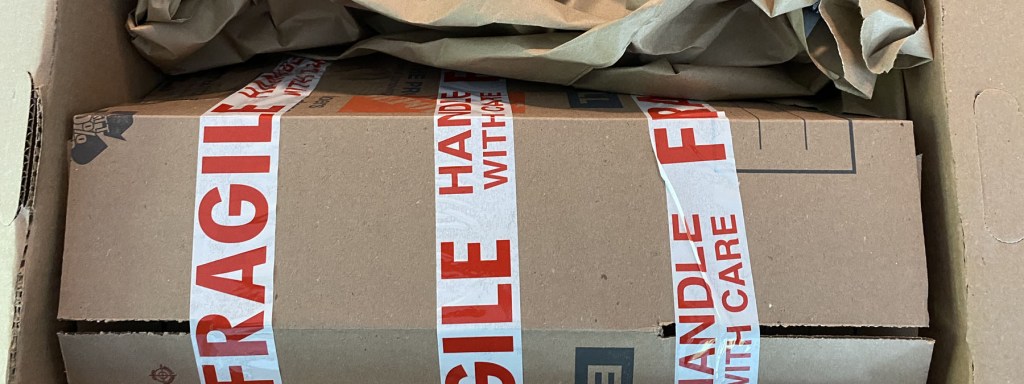
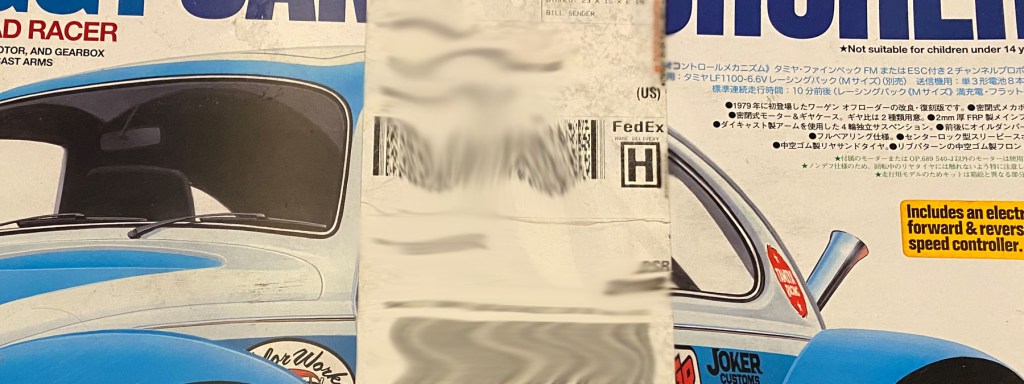
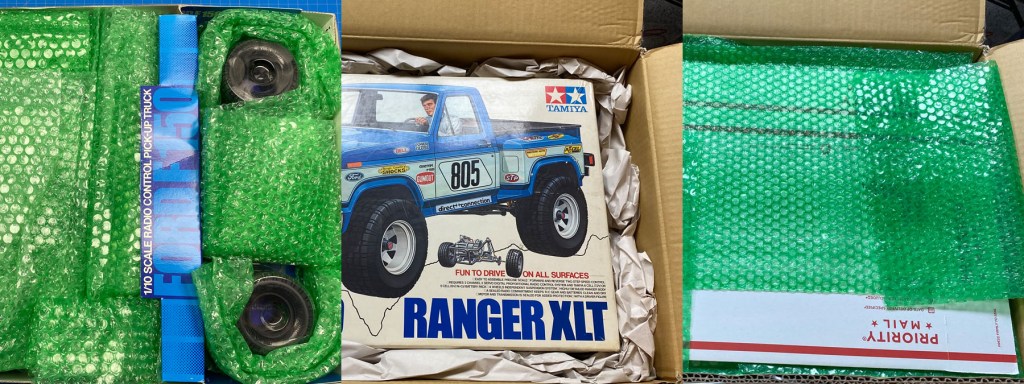
This first tip should be pretty obvious but you would be amazed the number of times I have seen this. If you are shipping a vintage kit, do not put the shipping label directly on the box!!! Thankfully this example was on the Re-Re but I mean come on people, let’s use our heads just a little bit here.
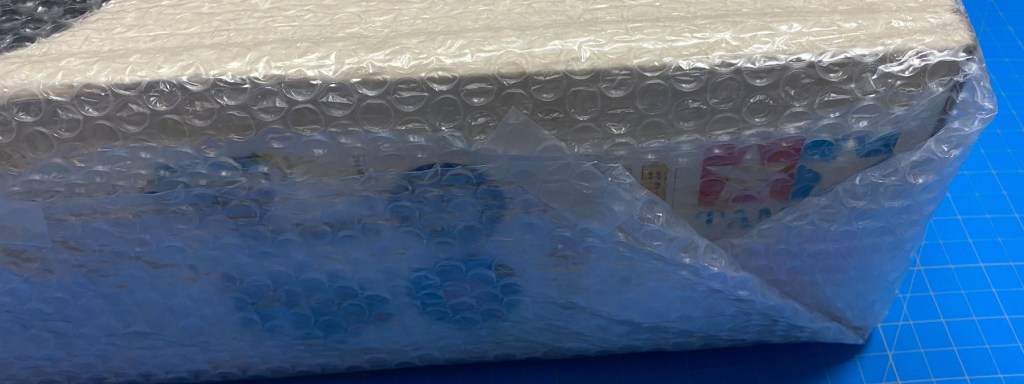
With NIB’s, the condition of the box is important, so take care of it. You should wrap the exterior of the box completely with bubble wrap. This serves two purposes. First, it protects the box from wear and tear during shipping and also in the case where the box gets jabbed. The other benefit of this is that if for some reason water gets inside the box it provides another layer of protection. Water is evil!
But let’s back up a bit. To me, the most important time spent packaging a NIB is done inside the box. This is not always possible since some kits are sealed and some have the blister packs sealed. You should never break any seals just for this purpose since it reduces the kit’s value but, open any box that is already open and make sure you pack it so that absolutely nothing moves during shipping. This is actually one reason I rarely buy a NIB kit that claims to still be factory sealed with plastic wrap. These kits will be shipped without the ability to protect the inner components and I have seen many times that this usually means tree parts get damaged and body shells get scratched.
Here is a superb example of a well packed NIB I received. The kit box was protected with layers of bubble wrap on all sides. Extra cardboard was used to further buffer the shipping box from the kit box. Then a buffer layer was extended around all four sides of the shipping box, including the bottom. Once I opened it up, every piece and part was individually wrapped in bubble wrap to completely avoid movement as well as protecting the components from themselves.
Using my Avante as an example you can see how the inside of the blister packs are completely filled and secured with packaging. You should also buffer the body shells if there is more than one piece. Finally, make sure all open areas on the top of the kit have been filled.

Miscellaneous
At this point I have covered most of the major items you need to be aware of when shipping vintage R/Cs. There are some smaller things here and there that I have seen go wrong so if you want to go the extra mile this next section will also be of interest. Here is a quick rundown of other examples of good things that I have seen people do with their shipping.
- Completely surround and isolate each part to make a happy package
- Throw some extra padding around small loose items that might rattle so they don’t get damaged
- Whenever possible always take the time to individually wrap each component in the box
- Remove the shell and build structure inside the outer box as a great way to avoid the box from crushing and also keep larger items separated
- Top off screw box compartments so that items don’t slip between the dividers and make sure you securely close the lid so it doesn’t open up or flex
- Don’t forget the bottom, give it some love too!

In the end, give shippers a break. You can usually tell if a shipper had good intentions and the postal service just let you down or if the shipper really just didn’t care and screwed you. The first thing I do when I receive broken parts is to go back to the eBay listing and doublecheck the listing photos for something I missed. Some times the damage is already there, and sometimes it is not.
Thanks for reading the good, the bad, and the ugly of vintage R/C shipping! I hope that I can save at least one vintage R/C car from destruction. If you want more details or want more pictures of the above topics please watch my YouTube video.